Sewing is part of my world. I’ve been sewing since before my feet could reach the floor when I sat on a standard chair. My Mother’s sewing machine had a knee pedal, which made it possible for her to turn me loose happily sewing her fabric scraps into oddball made up clothing styles for my Barbies. I had surprisingly little supervision, but managed to not sew my fingers with the machine.
Since then, I’ve made a lot of weird stuff, including prom dresses, a Victorian hat, a topcoat with tails, bathing suits, an inflating blueberry costume, spandex bike shorts, tool bags, a veritable herd of stuffed animals, and waaay too many Color Guard flags.
Recently, a good friend asked for some fabric masks , and another friend asked for instructions to make masks. It seemed like a good idea to document the making process for anyone else who wants it. As always, these masks cannot be guaranteed to keep you 100% safe from contracting airborne diseases, but may help, and certainly show others that you are trying to keep them safe by avoiding droplet spread. My personal feeling is that they help a lot when a community commits to wearing them in public.
Here are the steps I cover in more detail below
- Prep materials
- Stitch tunnel along fold, right sides out.
- Place and baste elastic
- Insert wire
- Turn wrong sides out
- Stitch seams leaving turning gap at bottom
- Turn
- Topstitch entire outside
- Make pleats and pin
- Stitch side edges
These directions have been modified from the Deaconess Hospital mask pattern to include a nose wire, and a deeper mask which covers the chin area better. I believe the modifications provide a better fit and more comfortable wearing experience with less leakage, and little or no fogging of glasses.
Because my husband asked, all stitching in the instructions refers to an average straight stich on a sewing machine. Use a needle that’s capable of stitching through multiple fabric layers.
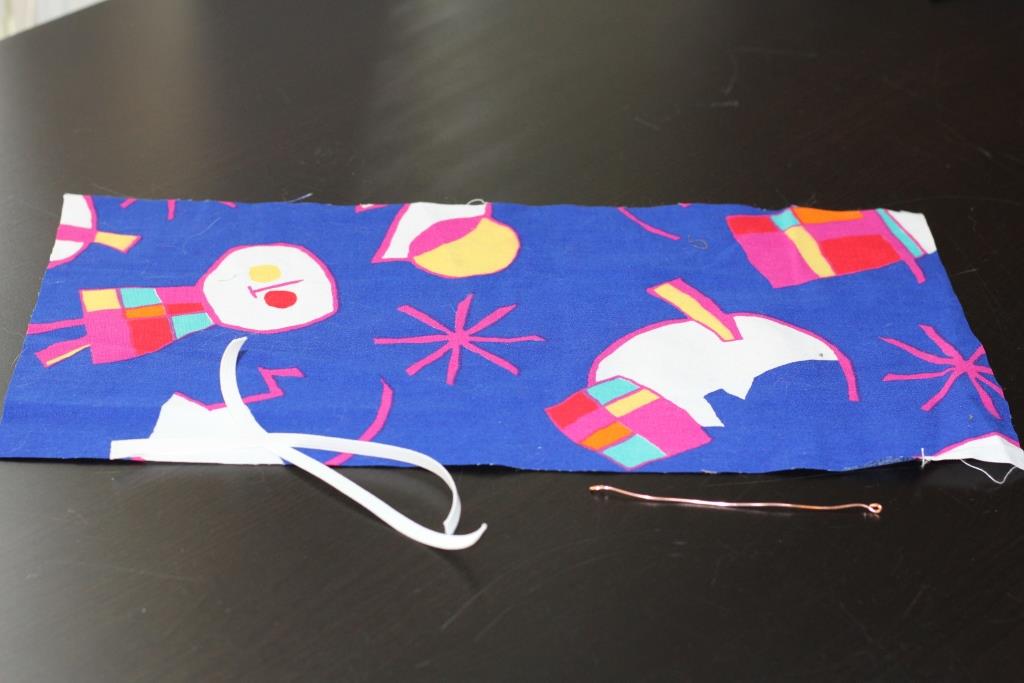
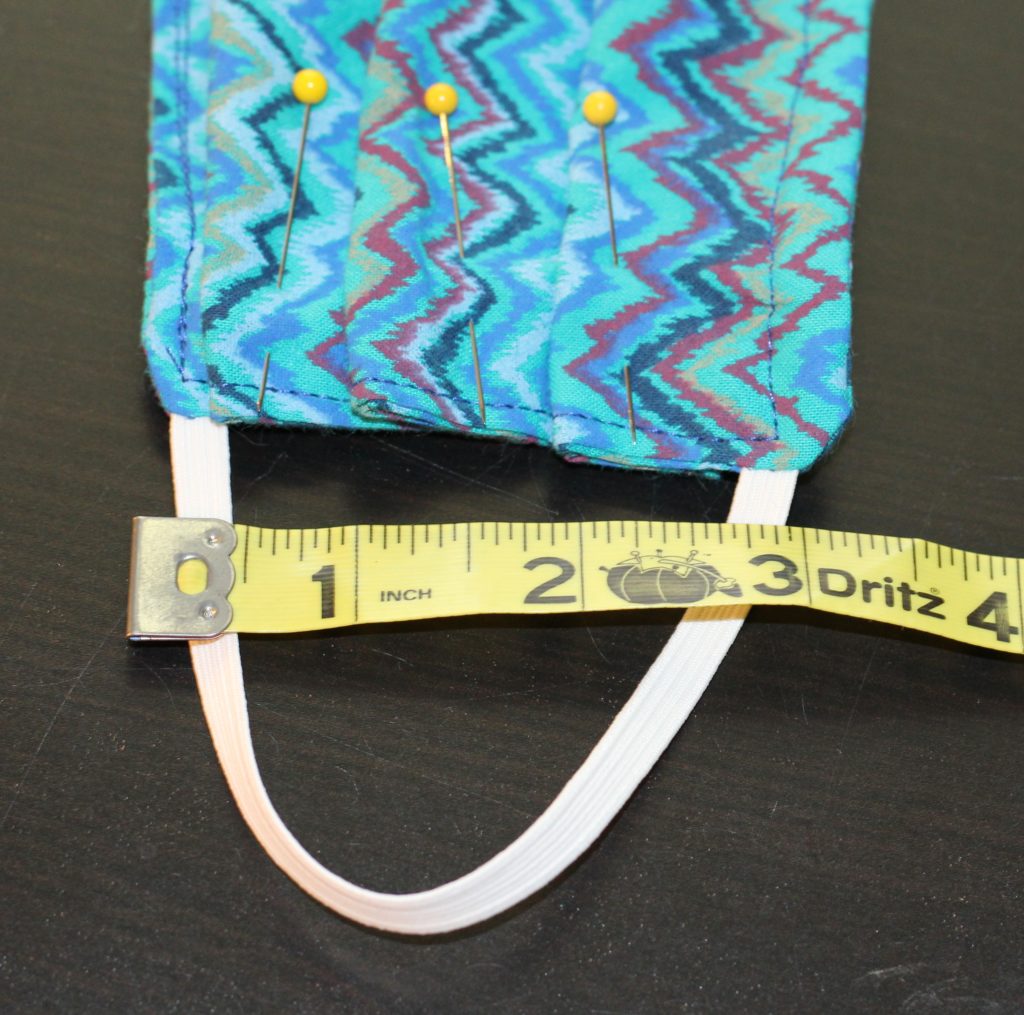
Adult male: Cut one tightly woven cotton fabric piece 9” X 18”, and two sew-through elastic pieces 7” each. Using wire cutters (or anything other than your fabric scissors) cut one 6.5” piece of 18 gauge copper wire, or unfold one large paper clip, or use one length of heavy plastic coated twist tie. You want something that won’t rust with repeated washings.
Small adult female or large child: Cut one tightly woven cotton fabric piece 8” X 16”, and two sew-through elastic pieces 6.5” each. Cut one 6” piece of 18 gauge copper wire, or unfold one large paper clip, or use one length of heavy plastic coated twist tie. You want something that won’t rust with repeated washings.
Sewing order:
Fold fabric in half right sides out to make a rectangle that is now 9 X 9 (or 8 X 8 for smaller size).
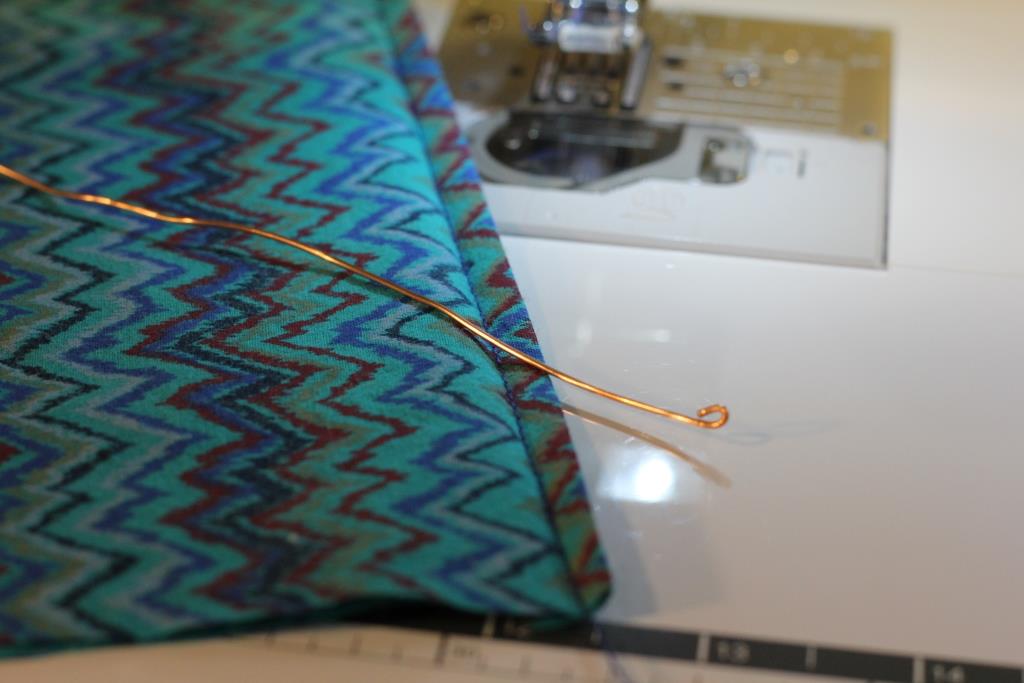
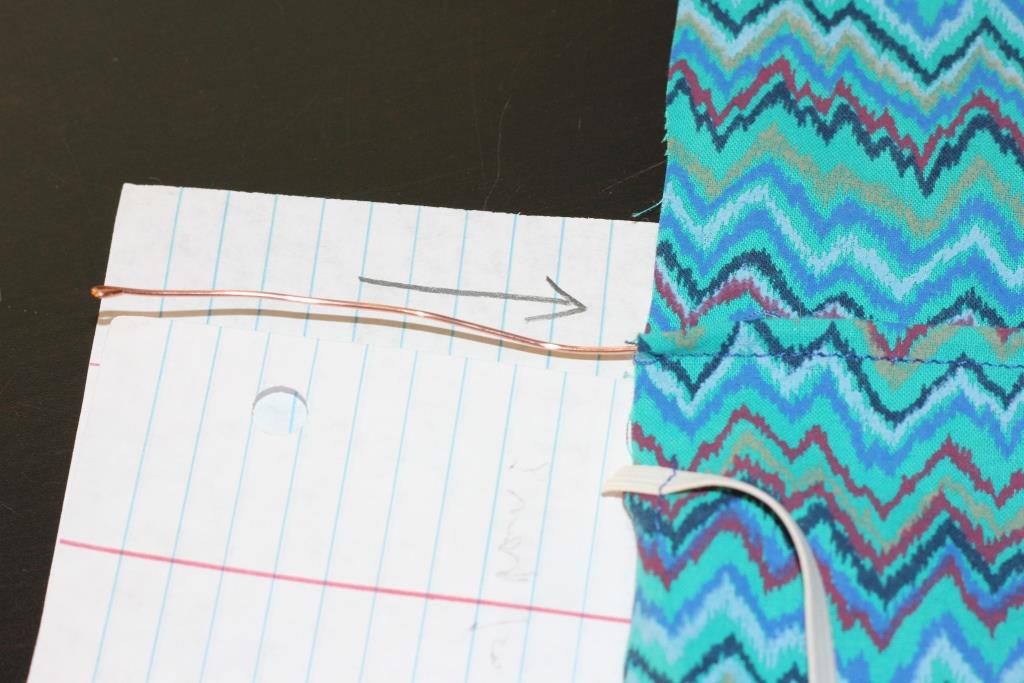
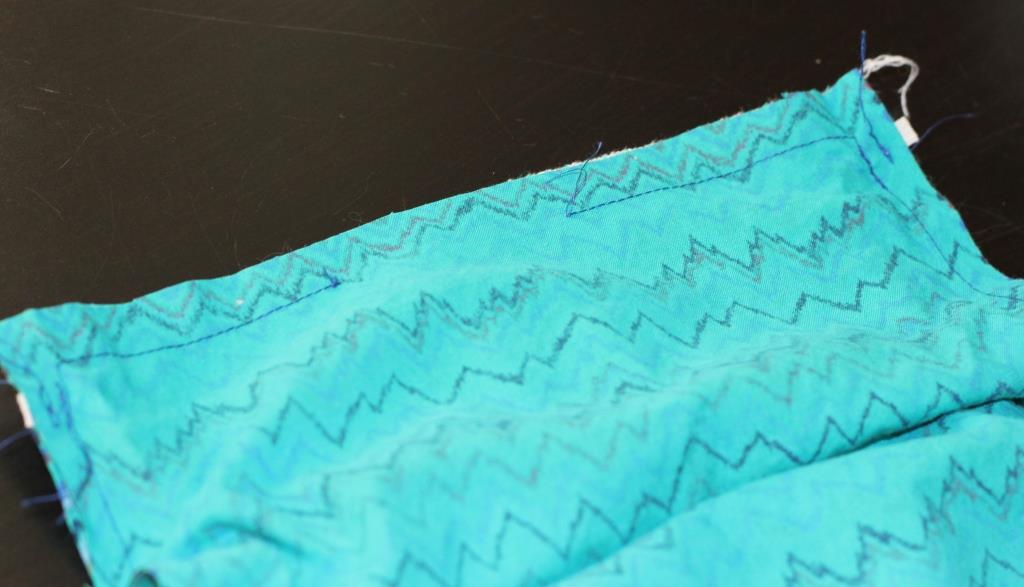
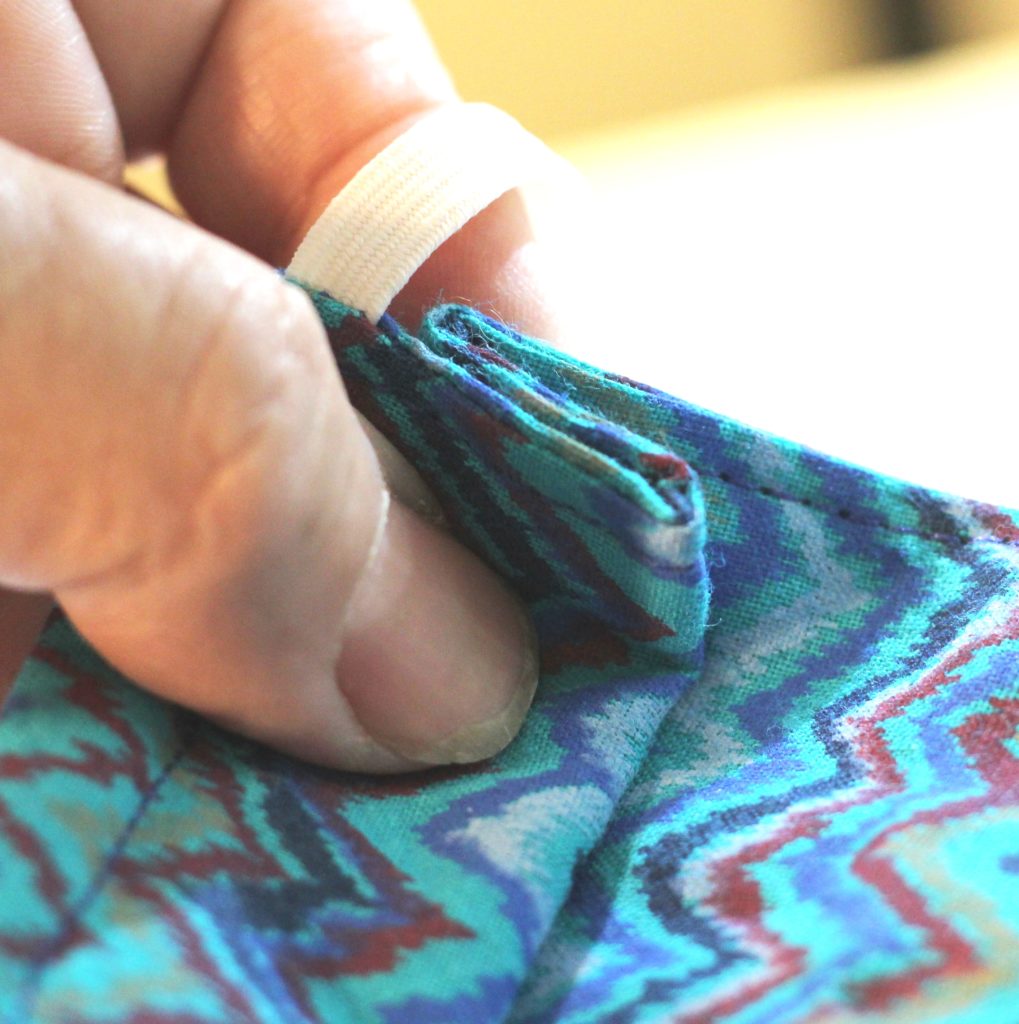
Stitch on outside of fabric near fold line to make a tubular pocket for the nose wire. I use about a 1/4“ seam for this, but it’s not critical. Straight is good! A crooked seam will come back to bite you later.
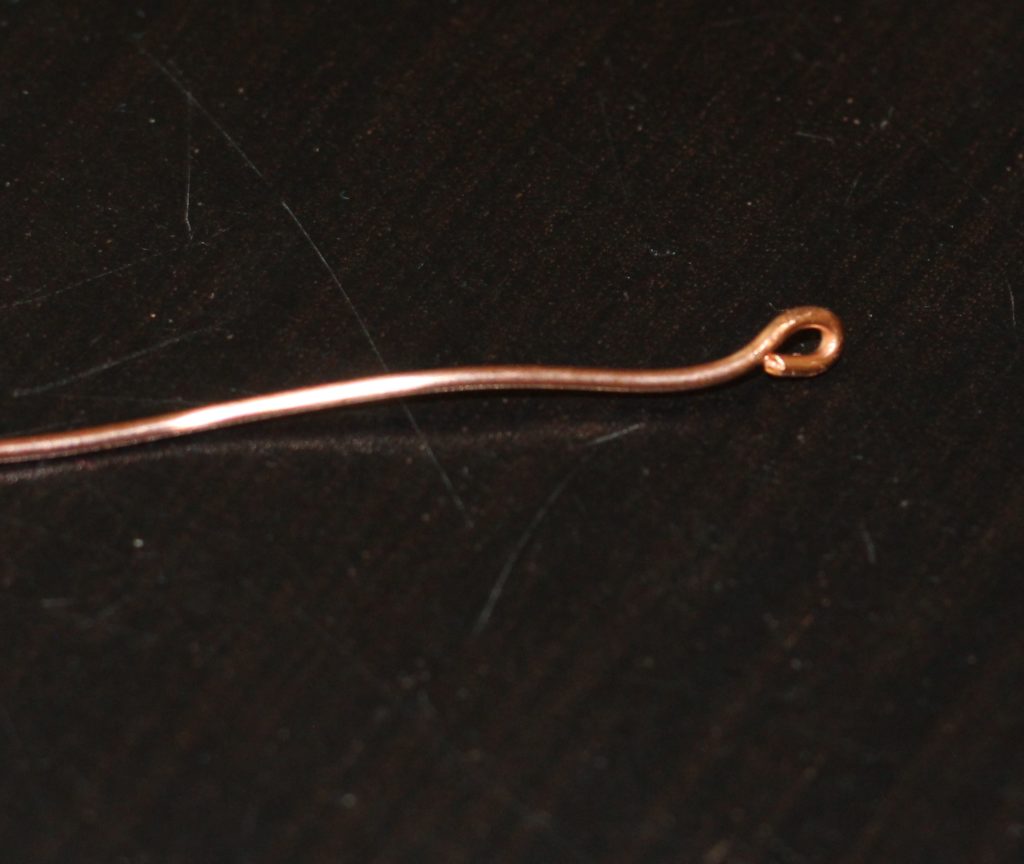
Use needle-nosed pliers or jewelry pliers to make a tiny loop in the ends of the cut wire. Make sure the cut end curves back far enough so that it touches the body of the wire. This is to keep the sharp ends from cutting through the cloth and/or poking the wearer. How you do it and what it looks like don’t matter, you just want a rounded end with no sharp points. Use your fingers to feel and make sure it’s right before proceeding. It’s going to be completely encased later, so now is the time for that.
Turn the fabric wrong sides out and use a thumbnail to open and flatten the seam as much as possible while turning.
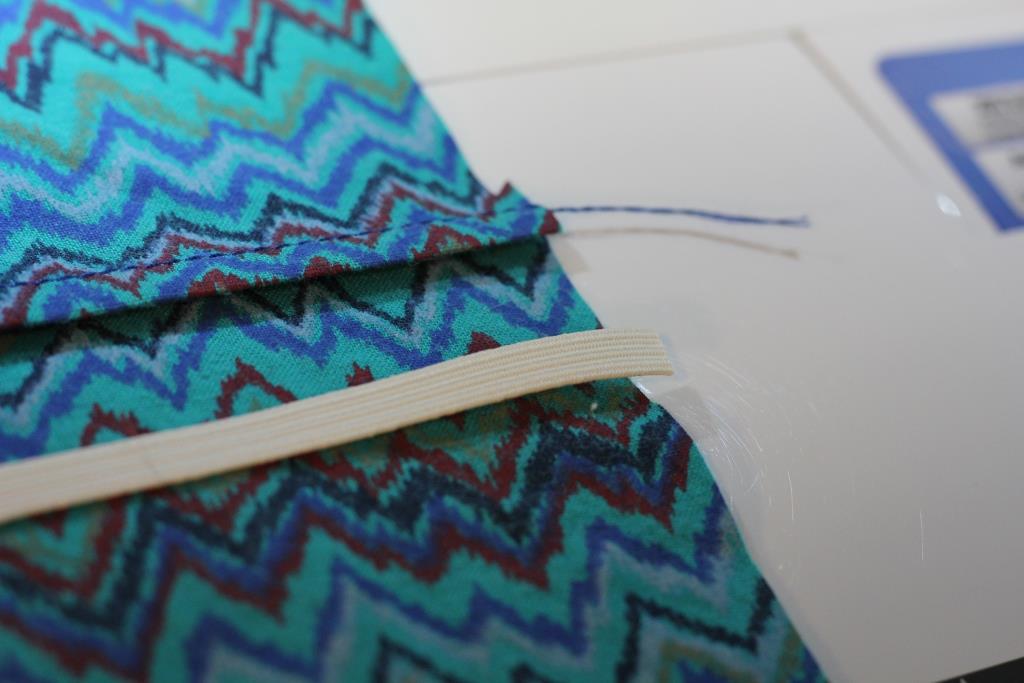
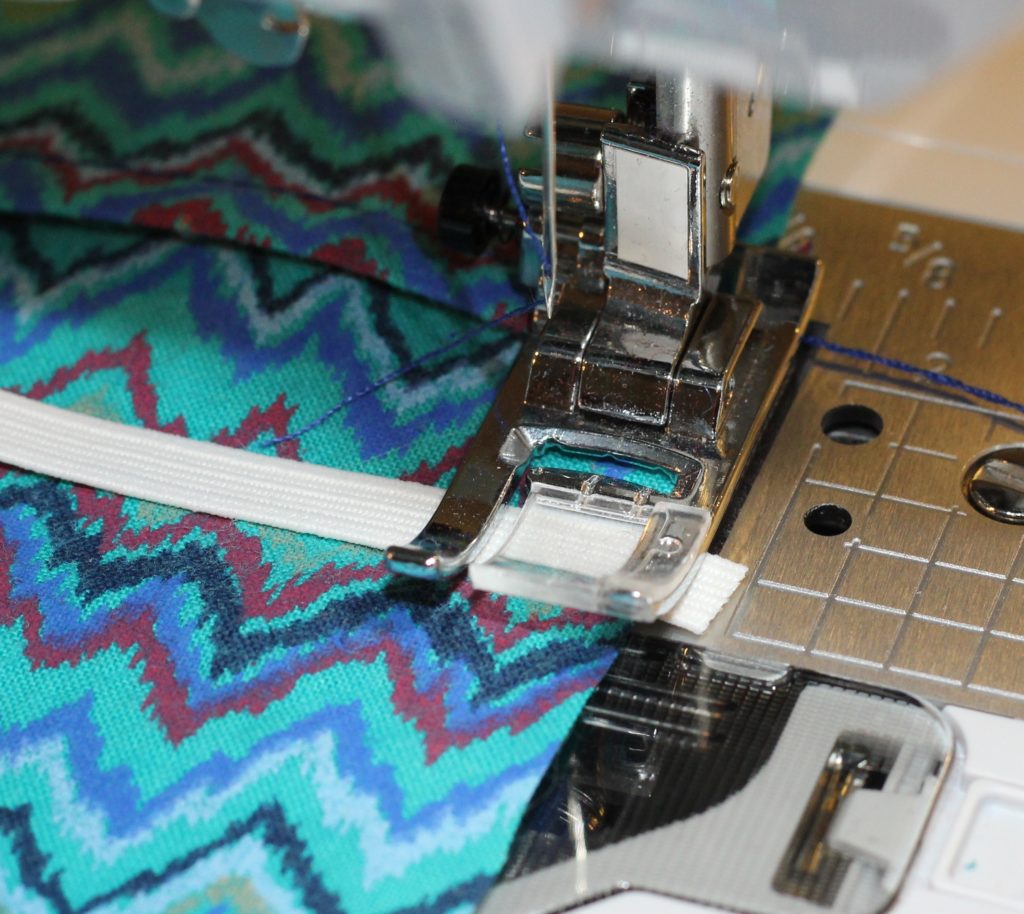
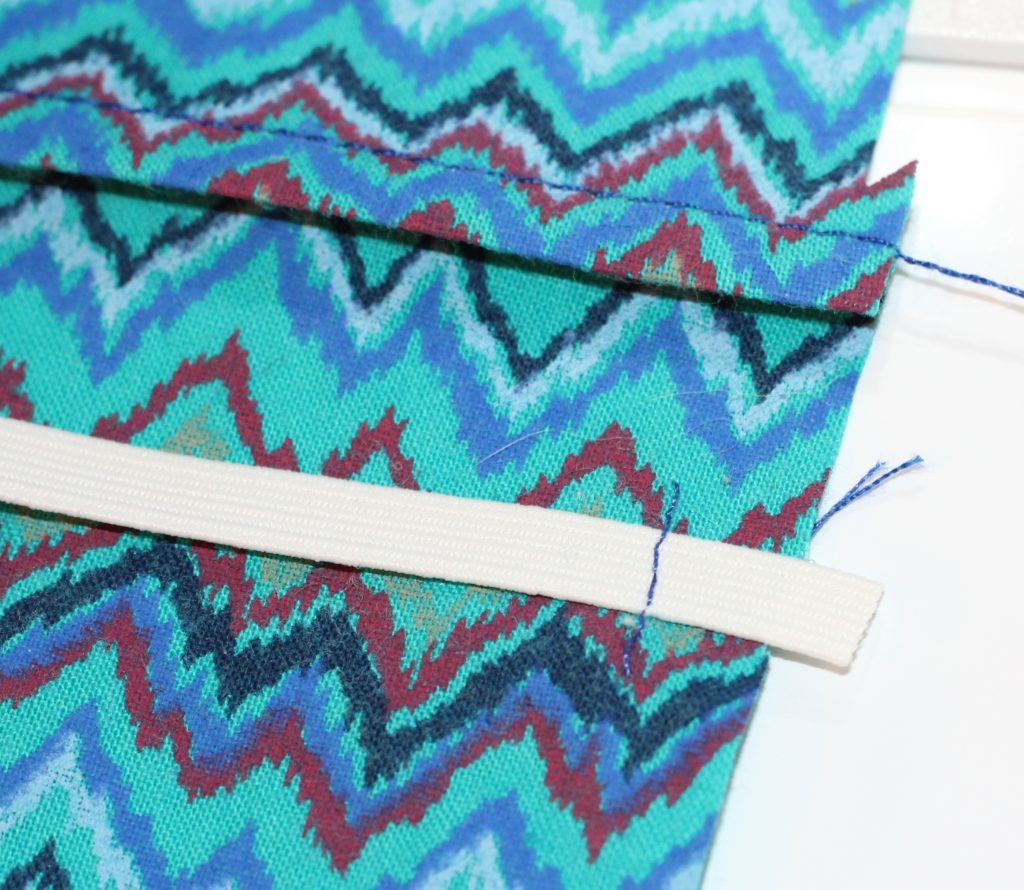
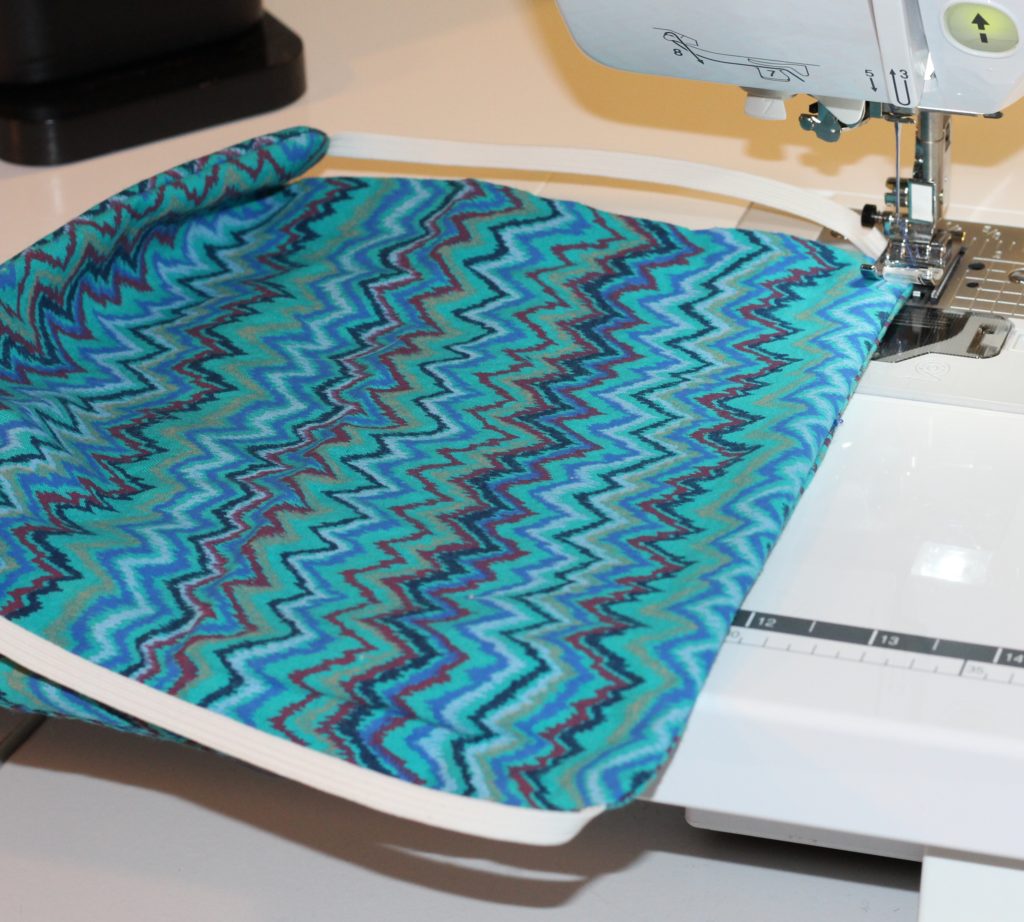
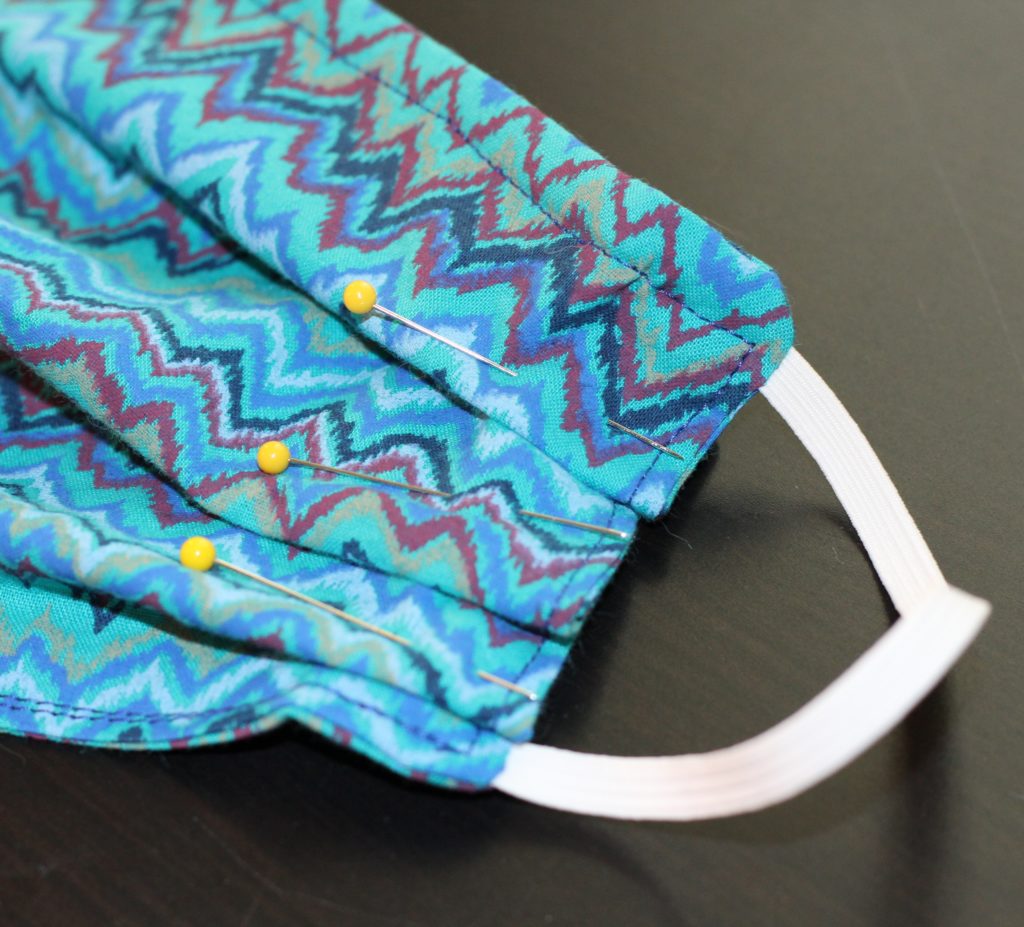
On bottom layer only (indistinguishable from the top layer at this point, so just pick one!), on the right side of the fabric, pin elastic strips to each side. The length of elastic should be lying on the fabric surface, not sticking outside the fabric. If you want, you can leave a tiny bit of the end sticking out past the fabric for better visibility later. One end should be pinned about ¾ to 1inch below top of mask. Pin the other end about ¾ to 1 inch above the bottom of the mask fabric. Do both sides. The mask fabric can be folded so that the elastic doesn’t have to be stretched. That makes it much easier to pin. Once it is pinned, machine baste the elastic to one layer of fabric along the seam line, 3/8 inch from the edge. Remove all pins.
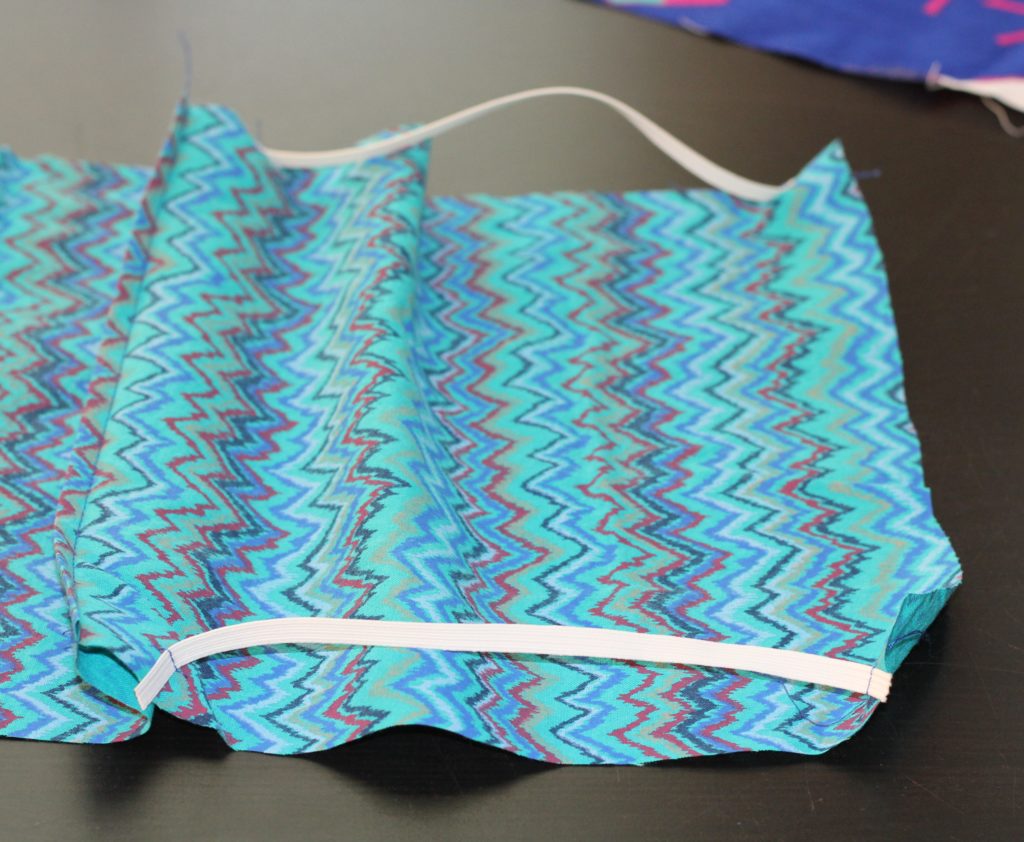
Thread the wire into the tube sewed in the fold, and center it.
Now that the elastic is held in place by stitching, match all cut edges and corners of the mask fabric. Advanced sewers can skip pinning, but beginners and intermediates should pin everything before stitching. I prefer to place one pin per piece of elastic on the outside of the fabric sandwich to help keep the elastic from wiggling around and getting crooked during the seam stitching. Again, you will want to let the fabric bunch up in the middle to keep the elastic from having to stretch while pinning.
Stitching: Leave a 3 inch gap in the center of the bottom edge. Start at the edge of that gap and stitch the bottom edge to the corner.
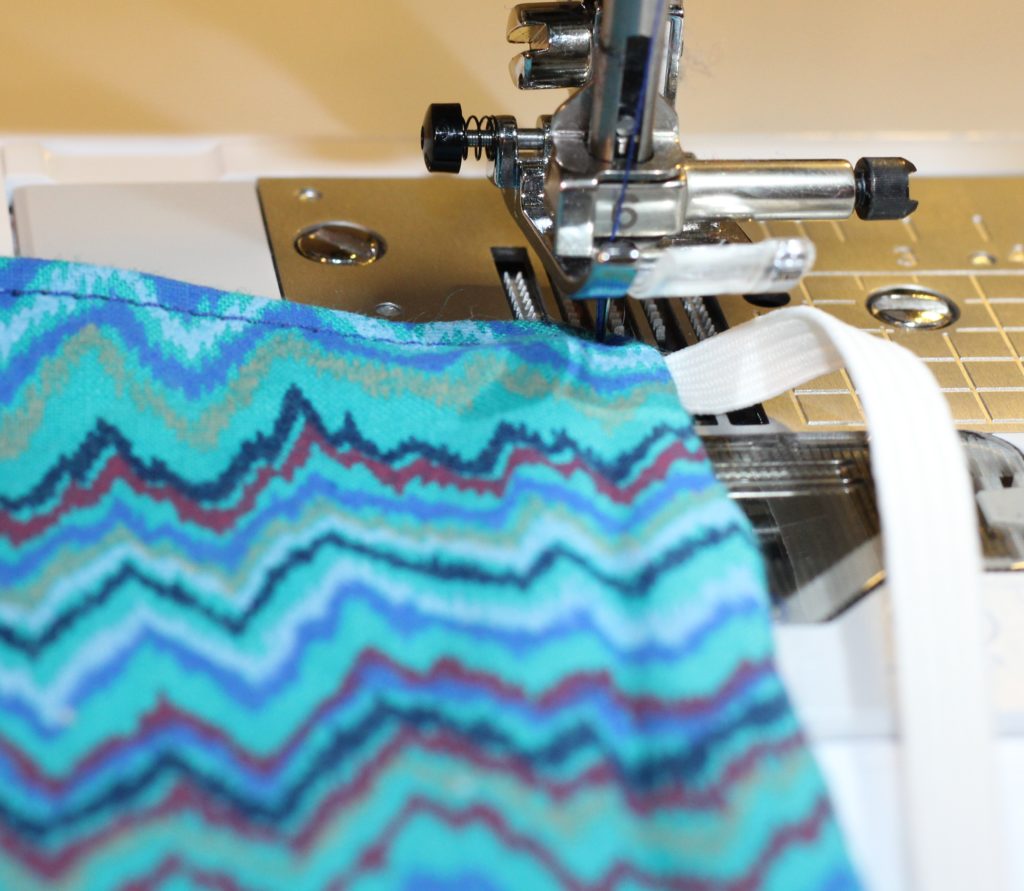
Pivot at corner and stitch side seam, backstitching over elastic end to reinforce.
Pivot at top corner and stitch carefully along top seam line, being VERY CAREFUL TO AVOID HITTING THE WIRE. Use your right hand to keep checking the wire position and keep it squished over to the right. Both the wire and its pocket should stay to the right of the needle.
Pivot at corner and stitch other side seam, backstitching to reinforce over elastic ends as you go.
Pivot at bottom corner and stitch along bottom seam line, stopping to leave the 3“ gap.
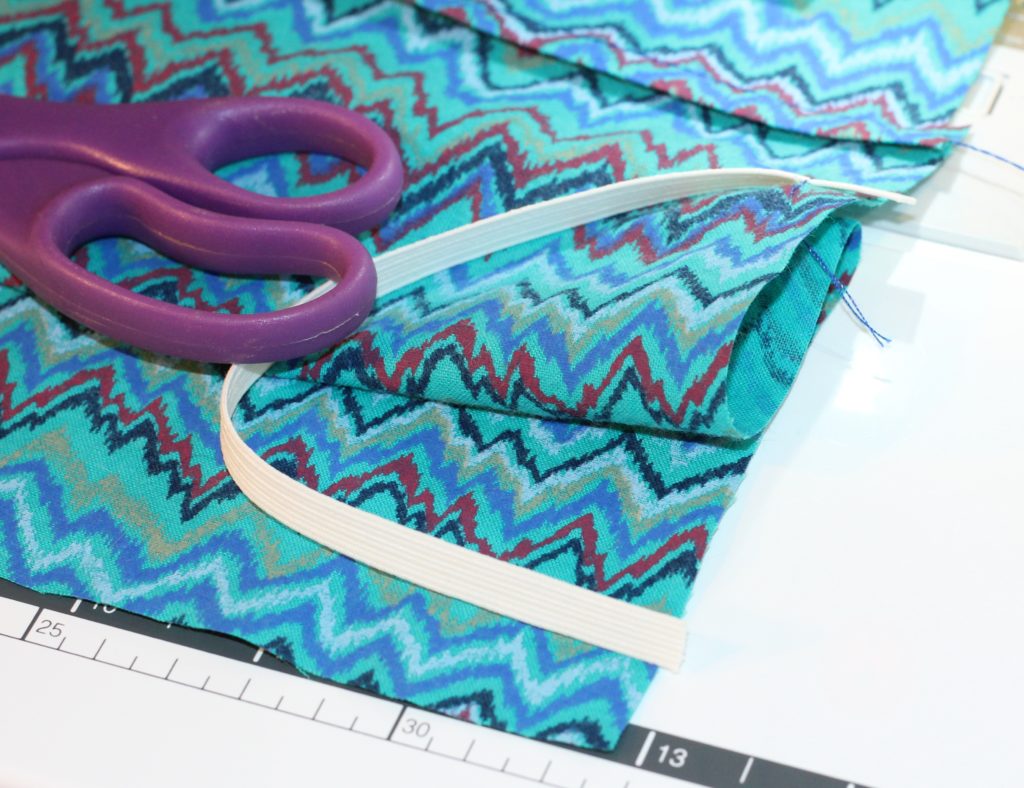
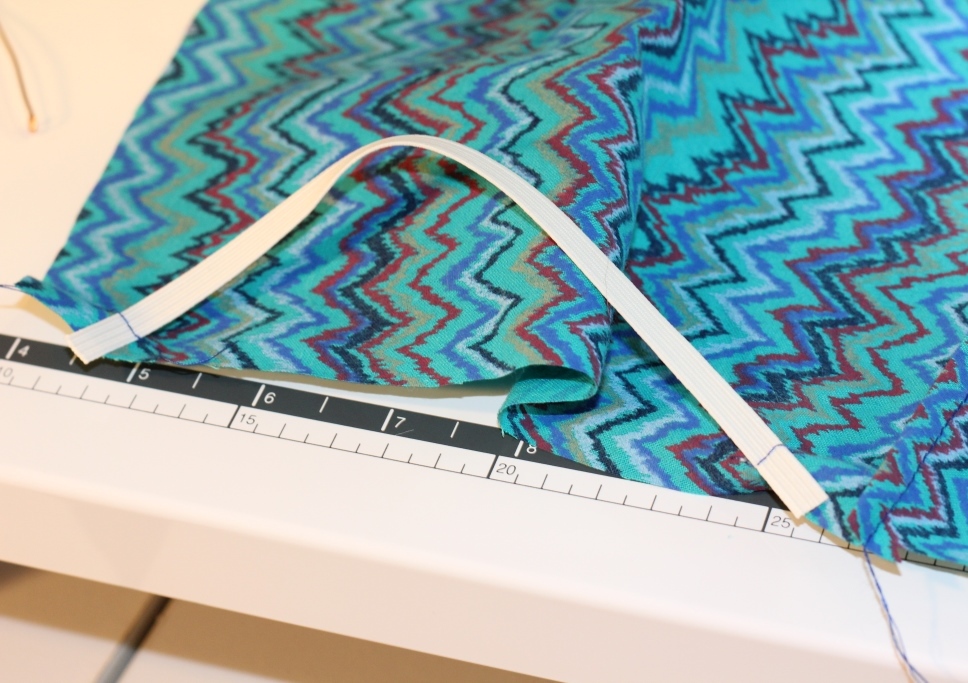
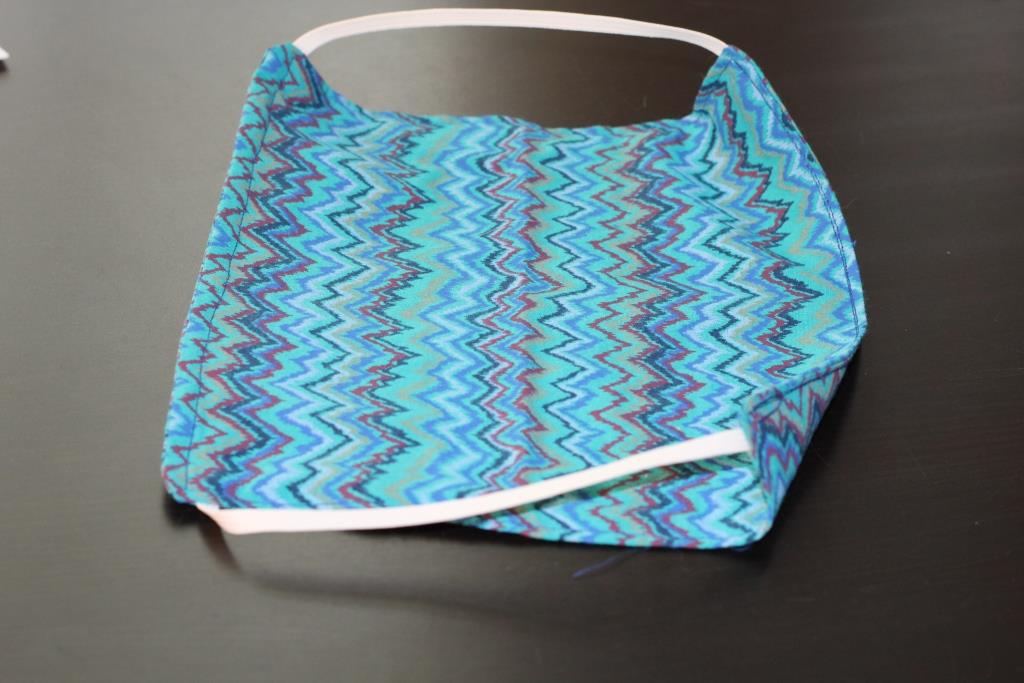
Turn entire mask right side out through gap in lower edge. Use a knitting needle, pencil, chopstick, butter knife or other tool to help poke out the corners and seams. Press if needed. Your elastic ear loops should be sticking out the sides.
Fold in fabric edges of the bottom of the mask where the gap is. Press flat with a fingernail or tool. Pin if you are a beginner.
Stitch from one bottom corner all the way around the edge of the mask, about ¼ inch from edge, except at top, where a larger seam may be needed to miss the wire. I start at the lower left front edge and stitch all the way around and across the bottom again for a double seam along the bottom.
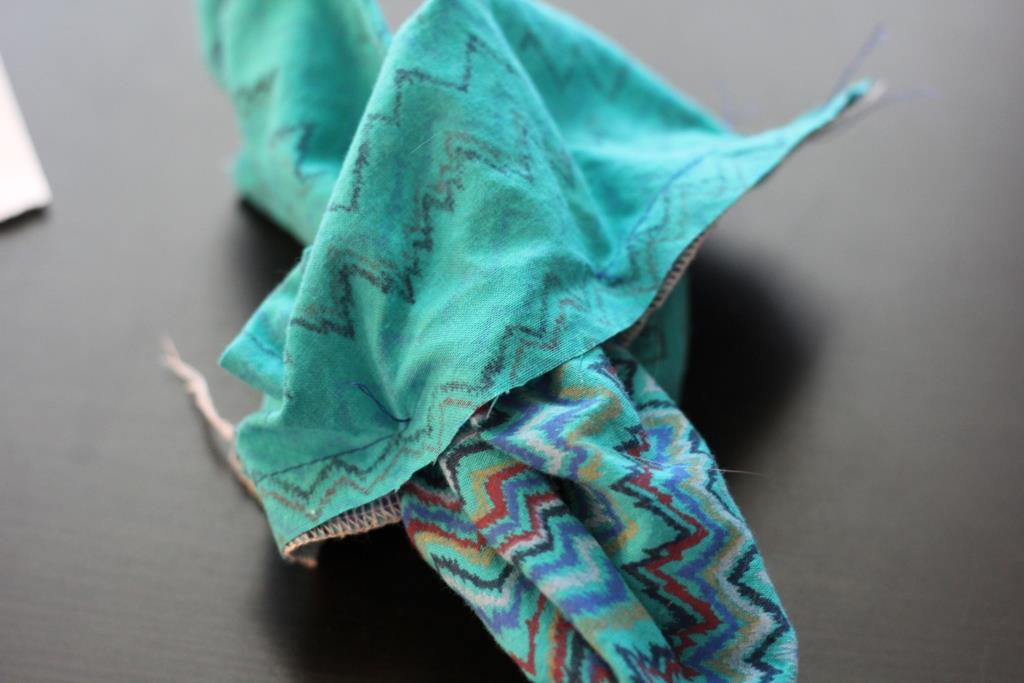
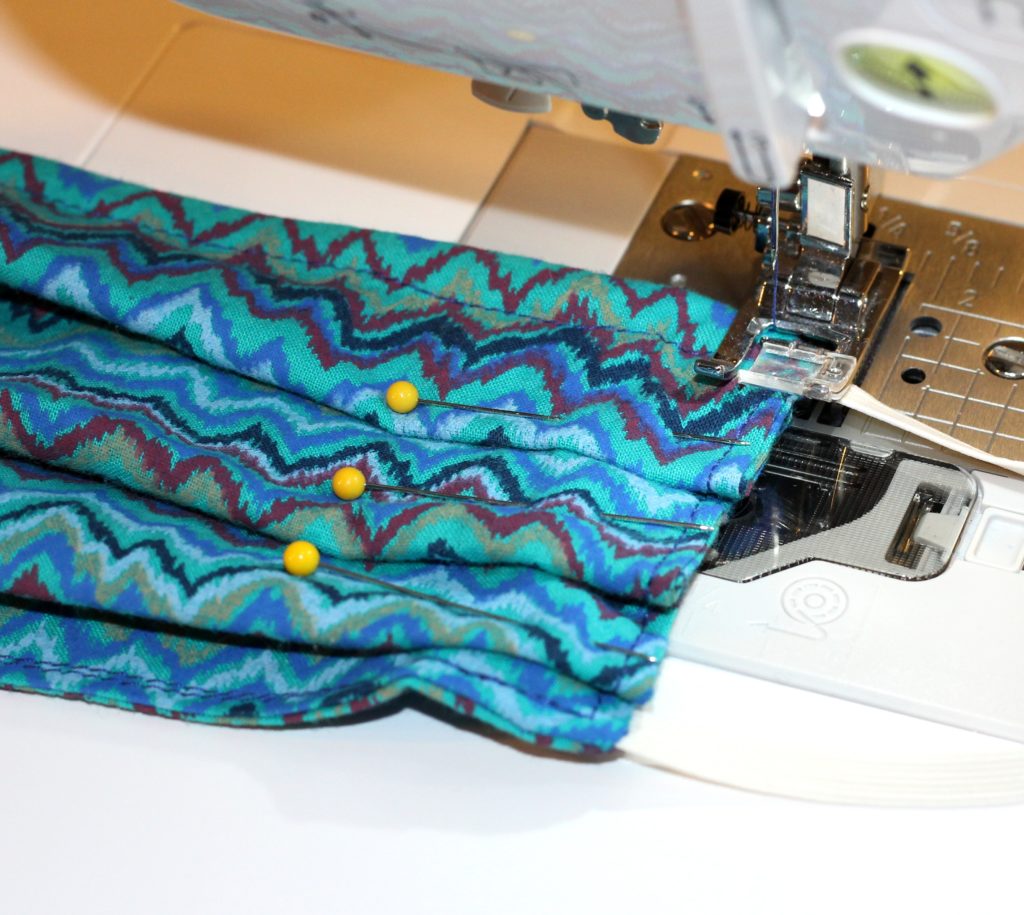
Make three deep pleats on each side of the mask. Pin in place. To get the pleats to match on both sides, I like to pin all the pleats on one side first and then pin the whole other side. It just takes less time that way. In truth, getting them exact isn’t important. They just shorten the sides of the mask, and allow for shaping of the front when it’s worn. You don’t want the pleats to overlap each other because there will be too many fabric thicknesses, so one pleat’s folds should stop where the next starts. (This will get more obvious as you start pinning)
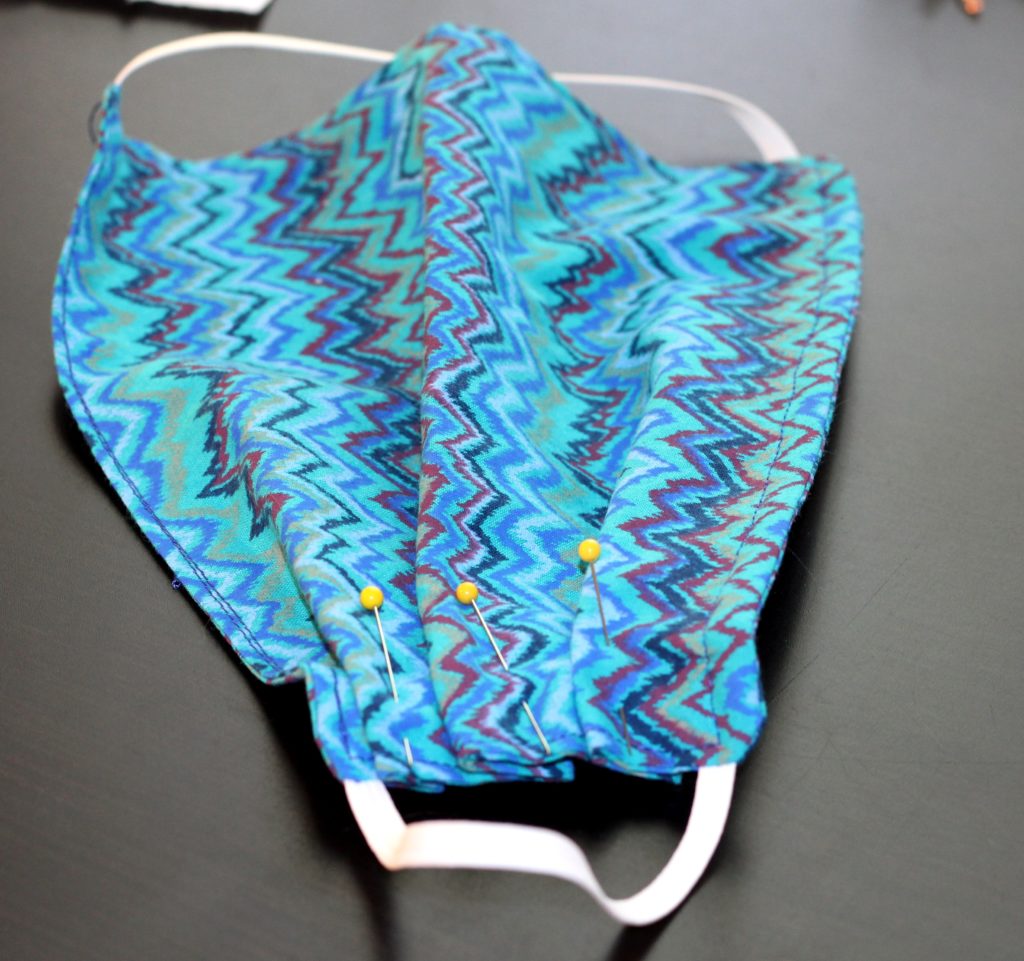
Stitch both sides through all layers, backstitching to be sure stitching does not unravel. You MUST remove the pins before you get to each one so that your needle doesn’t hit them and break. This step is worth doing slowly. I turn at the end of the seam and stitch back the other direction for a dobule row of stitching and extra strength.
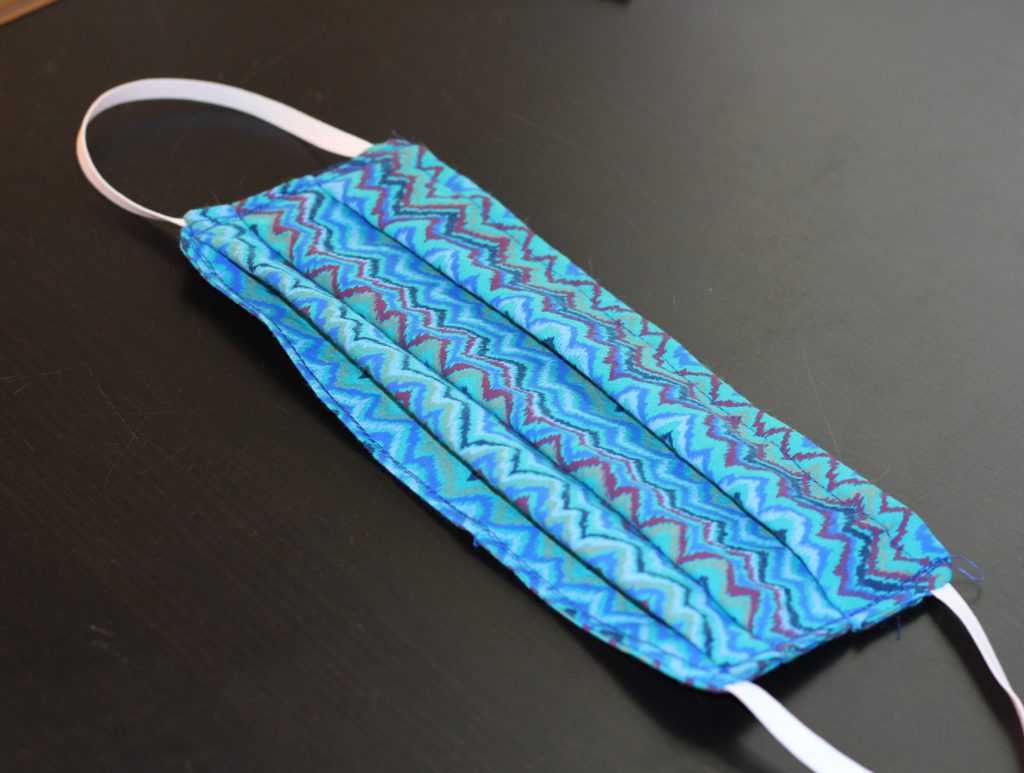
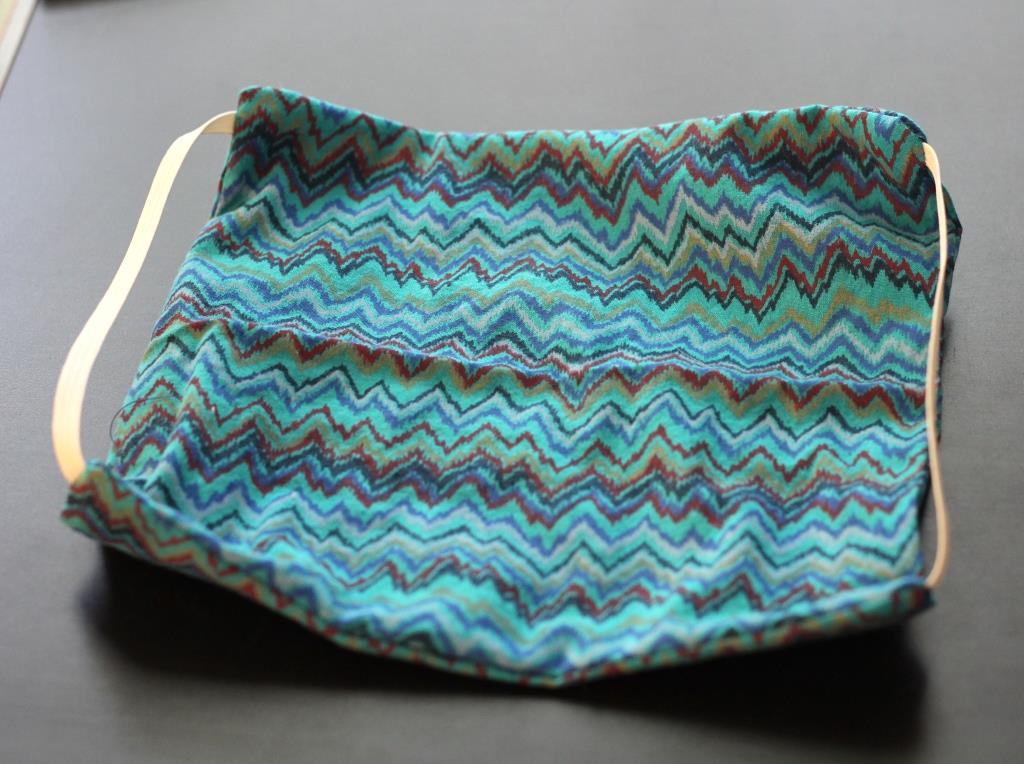
You’re done! Trim any loose thread, straighten out your nose wire, and organize the pleats a little, and your mask is ready for gifting or wearing.
Adjust the nose wire shape each time you put the mask on for best fit. These are hand washable in very hot water and soap, and can be hung to dry. We wash ours immediately upon returning home.
Make one and test the fit before cutting more. Elastic ear loops can be longer or shorter, and the body of the mask can be cut larger or smaller to fit you best.
You can do it!